If you’re like me, you not only enjoy your radios in the comfort of your shack, but like to go outside to “play radio” in events such as the upcoming 2013 ARRL January VHF Contest. This is a contest where I enjoy being a rover station. I also take part in spontaneous DX parties, public service events such as road races and providing Amateur Radio communications in times of need to such organizations as the American Red Cross. All of these activities at one time or another may require that battery power be used, as commercial power may simply not be available.
In this article, I’m going to discuss how I made my 12 Volt DC portable power source. I urge you to make, and have an auxiliary power available for yourself in the event you find yourself without commercial power. Fortunately for me, except for the battery box, everything else I needed was found around my shack and home.
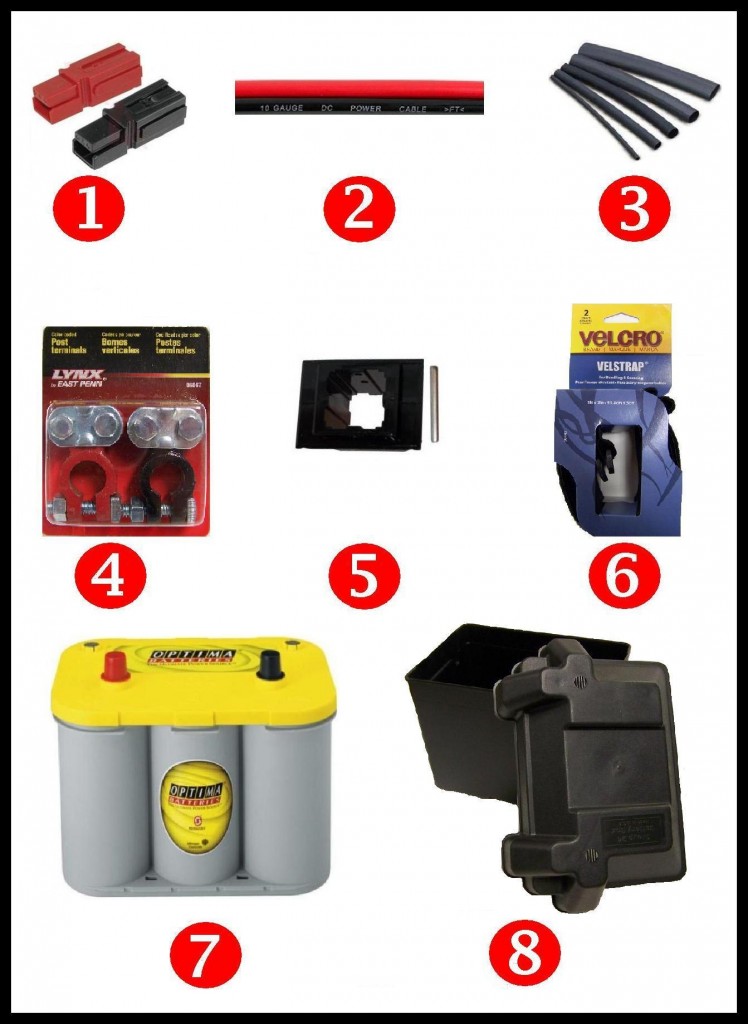
The components of my 12 Volt DC portable power source include:
1. Four Anderson Powerpoles – Two red, two black and all with 45AMP barrel connectors.
2. 10 gage red/black zip-cord power wire (It’s best if you not use speaker wire).
3. Heat-shrink tubing of various sizes.
4. Two battery post terminals, for the AGM 12 Volt battery.
5. One 4-pole snap-in panel mount for 2 sets of Anderson Powerpoles.
6. Two Velcro Velstraps – 3ft X 2in
7. One 12 Volt (AGM) vehicle battery. As your power needs may vary, and there are any numbers of detailed articles about battery selection, I’m not going to cover that here.
8. One full-sized battery box.

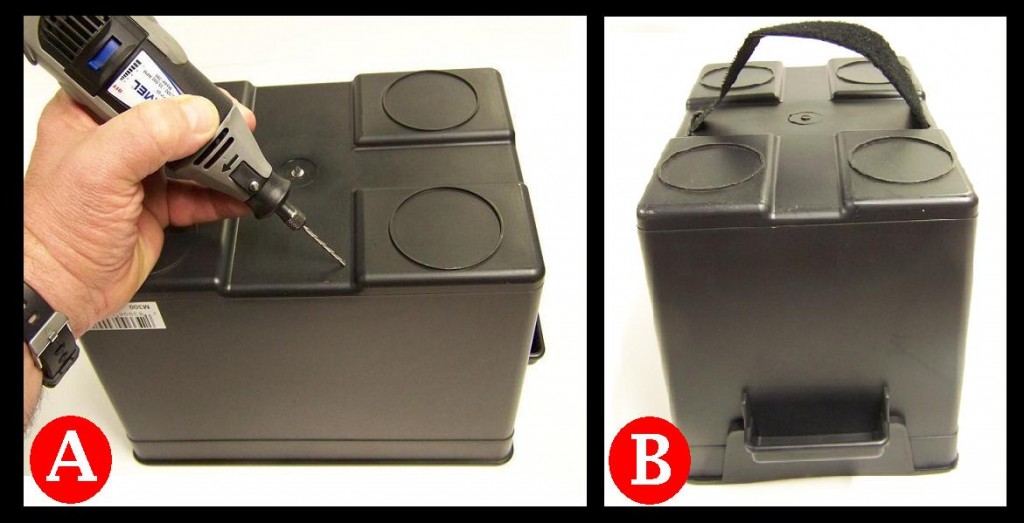
Once the components were laid out, the first thing I did was to turn over the battery box. Then with my trusty Dremel Tool and multipurpose cutting bit, I cut out two thin rectangle holes just big enough to pass one of the Velstraps through [Picture A.]. Once the holes were made, starting from inside the box; I simply passed the Velstrap out one of the holes, across the underside of the box, then back into the box via the other hole [Picture B]. This Velstrap will later be used to hold the battery in place, once it’s inside the battery box.

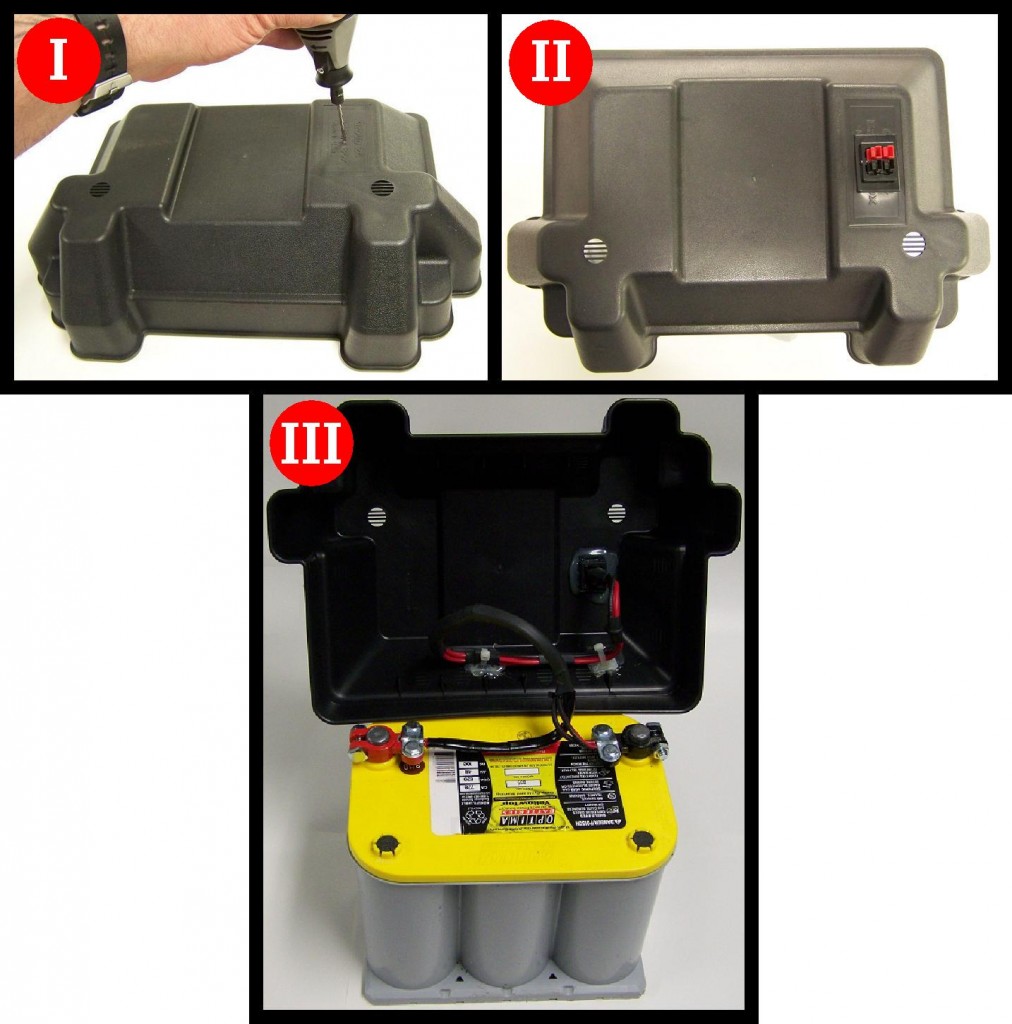
I next took the top of the battery box, and again using the Dremel Tool and multipurpose cutting bit, I cut a square hole measuring 1.00 inch by 1.25 inches. This hole will later be used as a place to insert the 4-pole snap-in panel mount to hold the Anderson Powerpoles [Picture I].
The wiring came next. Following proper techniques, I crimped a 45 AMP barrel connector onto each of the four wire leads of a 10 gauge red/black zip-cord power wire. Then, keeping with ARES/RACES standard orientation, I assembled the red and black connectors (tongue down, hood up, red on the left, black on the right as viewed opposite the wire side). With each pair assembled, I then joined the two pairs together, one set over the other. NOTE: When using large gauge wire, it’s easier to put the connector housings together before putting the barrel connectors in.
Once the four connector housings were together, I inserted the wire lead’s barrel connectors into their corresponding connector housings. Red into red, black into black. Using the proper sized heat-shrink tubing, I fed both sets of zip-cords through it, then brought the heat-shrink tubing all the way up until it met the base of the Powerpole connectors. I applied heat and shrunk the tubing in place.
Using a sharp knife, I then split the ends of the zip-cords and separated the red side from the black side all the way up till it reached the heat-shrink tubing near the Powerpole connectors. I then fed both red wire leads into one length of heat-shrink tubing, then both black wire leads into a separate length of heat-shrink tubing. On both sets of wire leads, I left a generous amount of wire extending beyond the heat-shrink tubing. I applied heat and shrunk each of the tubes around their respective wire lead sets.
Powerpole connectors on, power-leads separated then heat-shrunk together by polarity, it was time to insert the four-gang of Powerpole connectors into the 4-pole snap-in panel. The Powerpole connectors simply slide in to the 4-pole snap-in panel and are held in place by inserting a retaining pin [Picture II].
Were almost home, just a few more steps: Holding the lid at the distance I wanted it to be from the bottom of the box, I measured out the length the wire leads from the 4-pole snap-in panel to the battery posts needed to be, then cut off the excess wire. Now cut to length, I inserted both red and black sets of wire leads into a single heat-shrink tubing. I remembered to leave enough of the wire leads exposed in order for me to later attach these wire leads to the battery terminals. I then applied heat and shrunk the tubing. Once the heat-shrink tubing cooled, to minimize movement of the wiring harness I secured it to the top of the box. After striping away enough of the outer coating, I attached each set of wire leads to their respective battery terminals and attached the battery terminals to the battery posts [Picture III].

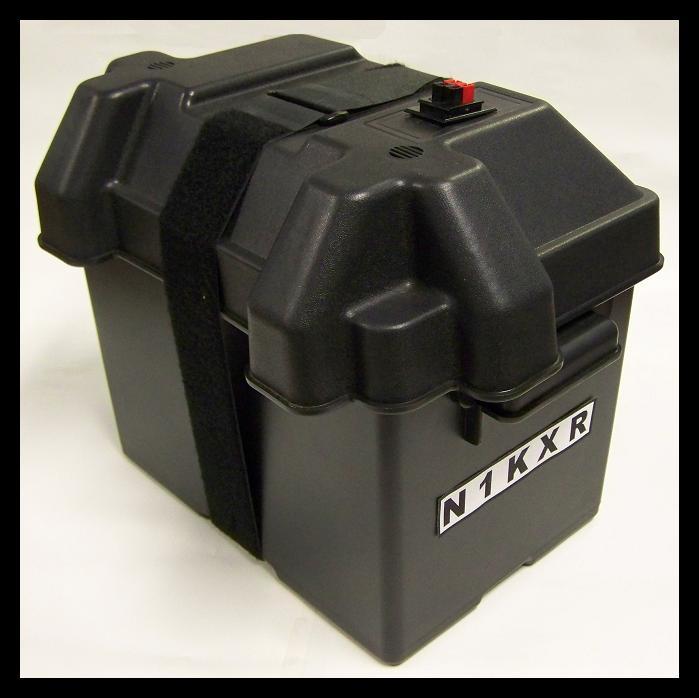
The above having been completed, I placed the top onto the bottom of the battery box and secured it using the last Velstrap…Done! I now had a safe, secure and ARES/RACES standard orientation compliant source of 12 Volt DC power.

It’s my hope that this article, by showing you how with readily available components and it’s quick and easy assembly, you’ll be motivated to create your own portable 12 Volt DC power source. After all, the bottom line is this: You never know when that next event will cause the lose of power to your shack, and there’s no guarantee there’ll be commercial power available at the places you go to, or get called to. A piece of equipment like this will give you one more way to be ready to get on, and stay on the air.
73
Rich – N1KXR
Comments
6 responses to “Building a portable 12 Volt DC power source”
Wow! Lighten up guys!!! Every project I build has a first prototype. It becomes evident after putting the first one together there needs to be modifications. Sometimes it takes ten changes or more Before you’re happy with the final product. I think it takes a lot guts to put your first ideas out there. Why not just post suggestions to make projects better without ridicule. I for one like your article. Don’t let a few negative comments stop you from what your doing. If we don’t keep this fun than whats the point?
Thanks for the comment.
Your words are most kind. I’m thankful you liked my article.
The author/builder provided no protection for the wire. Any type of over-current drawl there would cause a serious fire or explosion. More so, some sort of thermal runaway detection/protection needs to be installed. If you are going to spend the money on a new battery such as the one the author shows, then go to the trouble of purchasing a battery with screw in terminals. This will provide you better protection, less area of corrosion and less of a chance of coming in contact with the terminals. Also, I would purchase the terminal access on the side. What if you are someone opens that up and drops some thing conductive across the terminals? Look at how aircraft battery systems are connected. A little extra effort will go a long way to keep you and bystanders safe. Also, read the FAA procedures on battery care and your investment will outlast an identical setup that is care for just the regular way.
Thanks for the comment.
In regards to no protection for the wire, similar to a battery installed in one’s vehicle, fuses are not found at the battery terminals. They are found at the fuse-box and also in-line. When in use, there are fuses installed in the power-cord that connects the battery box, to the gear being powered.
As for the preference of a screw-in terminal as opposed to a post, you make a valid point. However, as I wrote in the article, I built this kit with parts (with the exception of the box) that I had around my shack.
With respect to someone dropping something across the terminals. The lid stays on and secured at all times. All power coming out of the box, as well as the charging of the battery, is done via the Powerpoles.
Similar to a battery installed in one’s vehicle, once the hood is opened, the battery is exposed and care needs to be taken. The same common sense applies to opening this (or any) battery box.
If and when the box were to be opened, I’m aware of what I’ll find inside.
Rest assured no one is going to open this box without me being there.
Thank you for the great tip regarding reading up on the FAA’s procedures on battery care. That’s what it’s all about, Hams helping Hams.
Awesome and great post, but the cost of the battery would kill me, also, what about adding some type of connector for a solar trickle charge?
N1ONO Geo.
Thanks for the comment.
Yes, this battery does cost a few dollars, but I didn’t buy it for this build. I already had this battery, so I used it for this project.
As for a solar trickle charge, that’s simple. In the same way the battery is kept charged via the Anderson Powerpoles and my Super PWRgate PG40S Backup Power Switching and Charging System. One could use these same Powerpoles and attach a solar trickle charger.